Chickens need fresh, clean water every day to stay healthy and productive. But rather than purchasing expensive, pre-made waterers, why not build your own? With a little creativity and the right materials, you can create a custom DIY chicken waterer that suits your flock’s needs while saving money. This listicle will cover 21 DIY chicken waterer ideas, each offering a unique approach to providing water for your hens. Whether you’re looking for something simple or more elaborate, there’s an idea here for everyone.
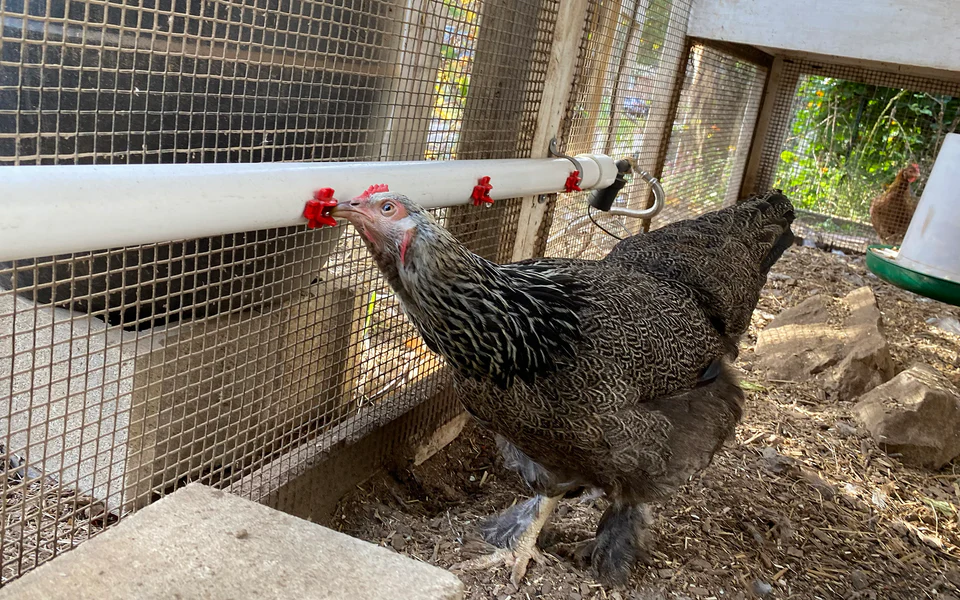
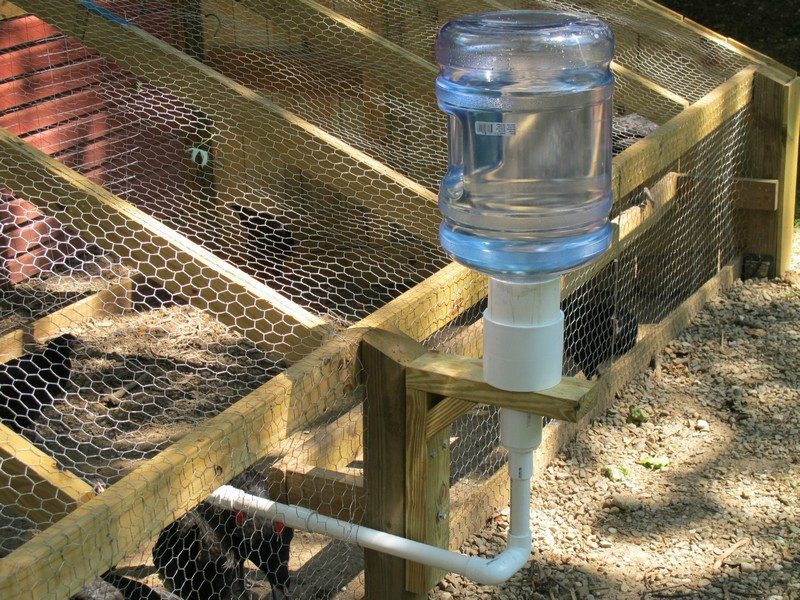
1. PVC Pipe Chicken Waterer
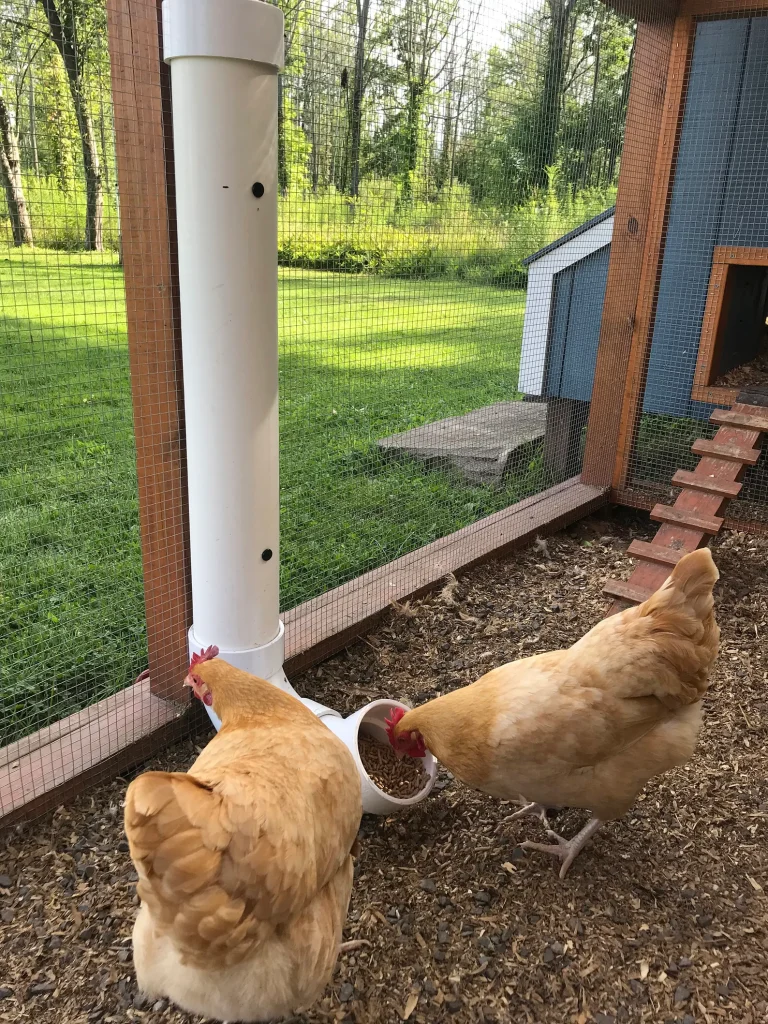
PVC pipe waterers are a great choice for those looking to create a long-lasting and easy-to-maintain chicken watering system. Using PVC pipes and a few connectors, you can build a gravity-fed system that delivers fresh water to your chickens without any messy spills or waste. This design is efficient, cost-effective, and ensures your chickens always have access to clean water.
Start by cutting the PVC pipe into desired lengths to create a series of pipes that will run along the chicken coop or outdoor space. Attach T-joints at appropriate intervals to create watering stations. You can add small cups or nipples at the ends of each section to allow the chickens to drink. The gravity-fed system works by letting the water flow naturally down the pipes, ensuring that the water levels remain consistent throughout the day.
One of the best things about PVC pipe waterers is how easy they are to clean. The pipes are smooth and non-porous, so bacteria and algae have a harder time sticking to the surface. With minimal maintenance, this DIY waterer can last for years, making it a great long-term investment for your flock.
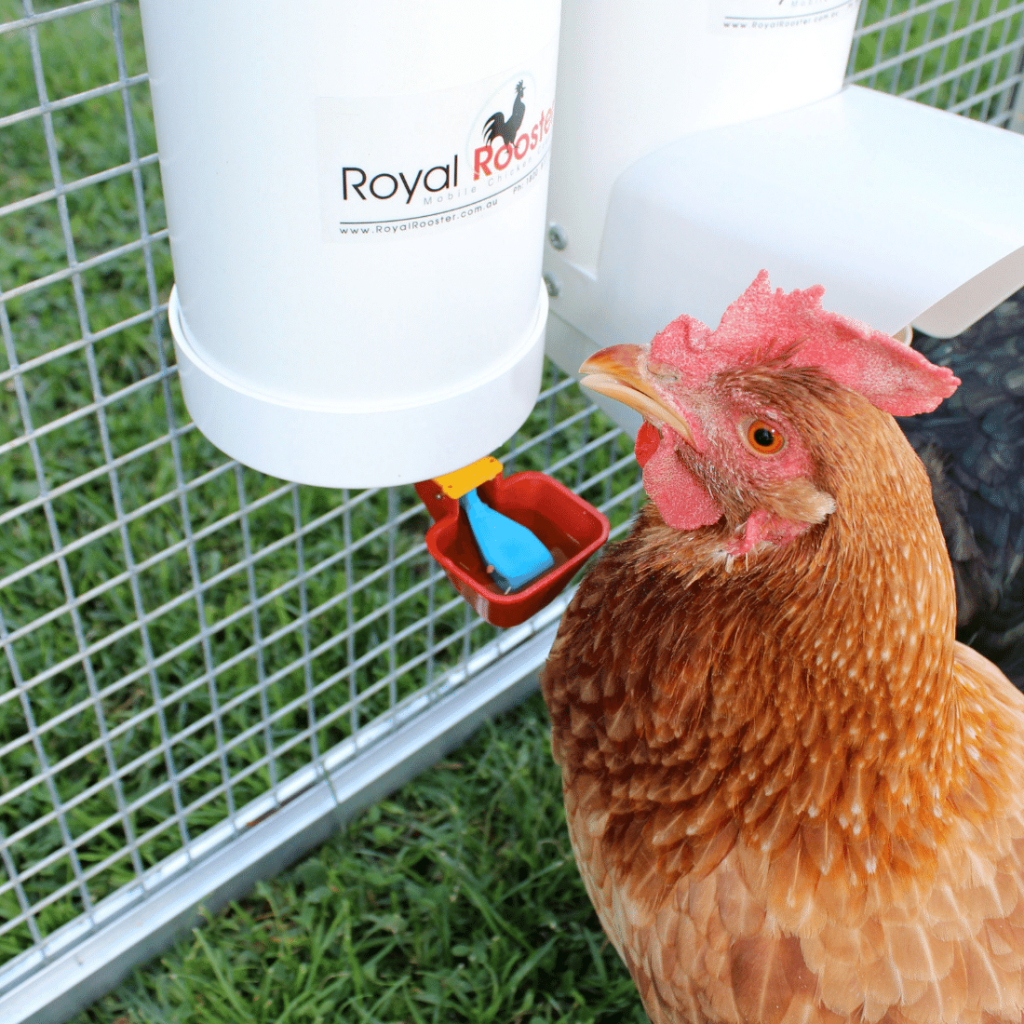
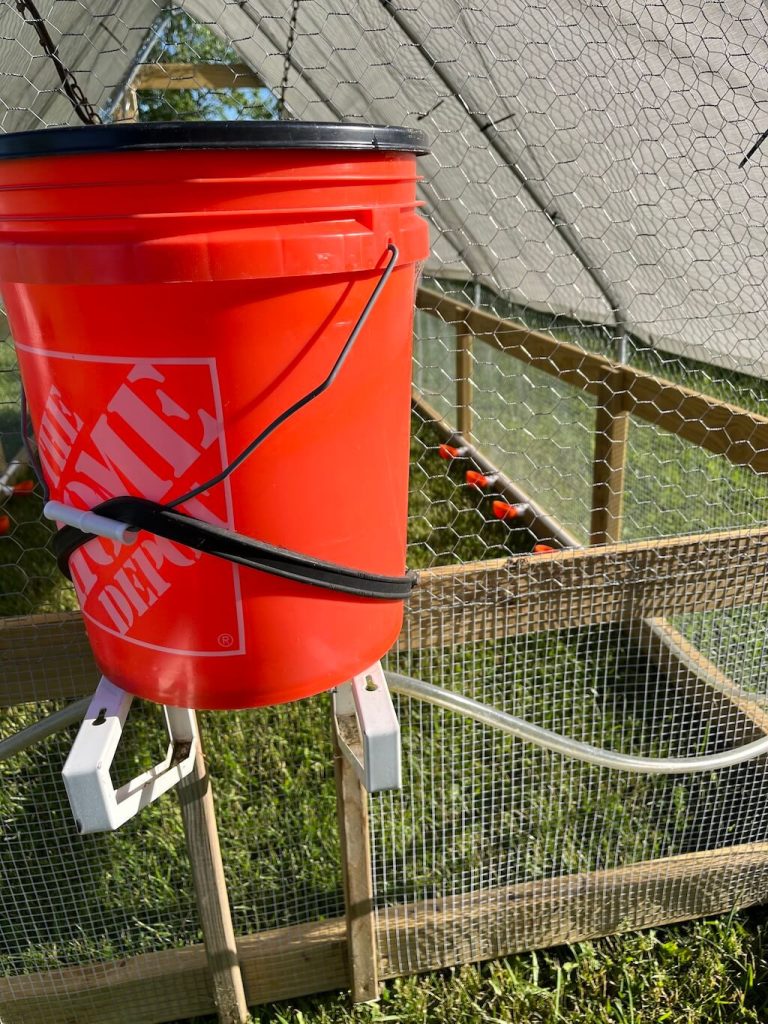
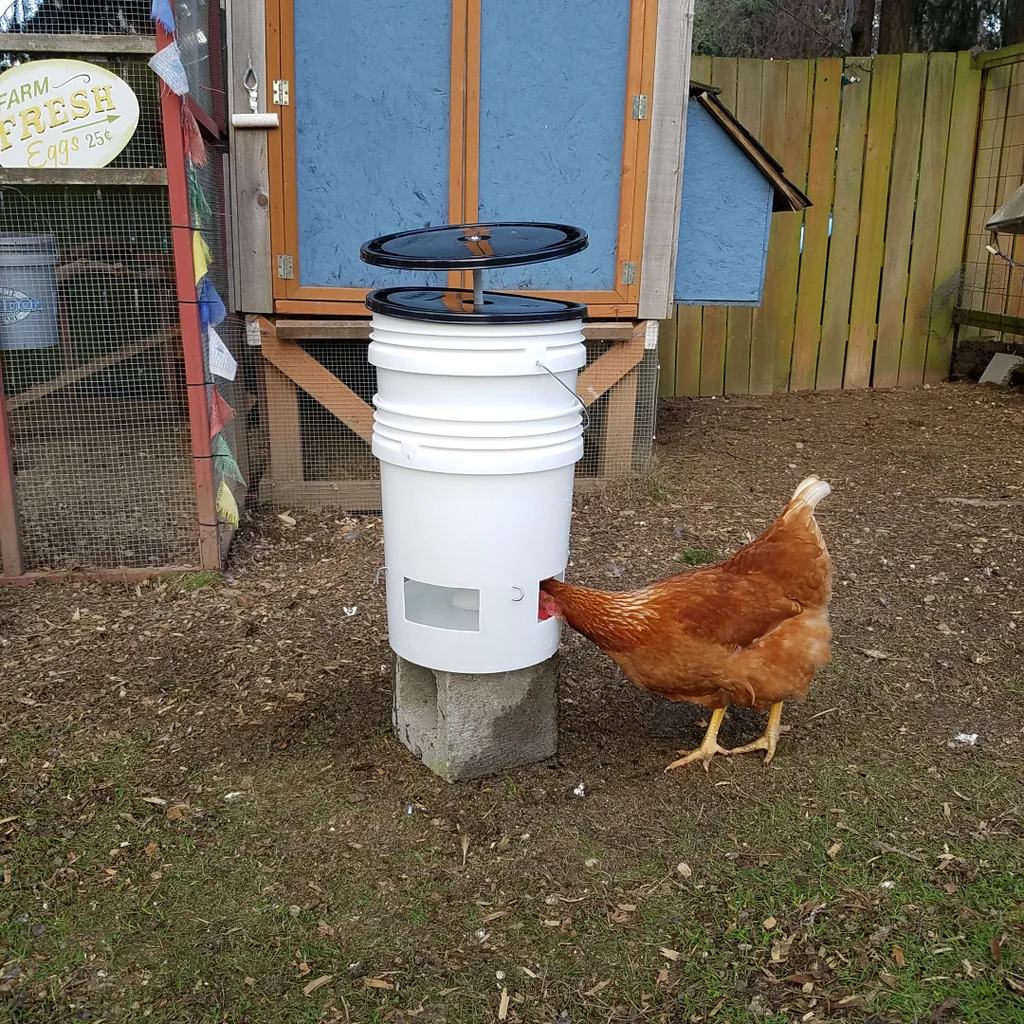
2. Bucket and Nipple Waterer
A bucket and nipple waterer is a simple yet highly effective DIY solution for providing water to your chickens. This system is ideal for smaller flocks and is incredibly easy to set up. The bucket holds a large volume of water, while the nipples provide a spill-free way for your chickens to drink.
To create this waterer, you’ll need a food-grade bucket, some chicken nipples, and a drill. Drill small holes in the bottom of the bucket and insert the nipples. These nipples will only release water when the chickens peck them, preventing water wastage and keeping the area around the waterer clean and dry.
The bucket can be placed anywhere in the chicken coop or outdoor run. As the chickens drink, the water will refill the system, ensuring they always have access to fresh water. Since the bucket can hold a large amount of water, this system works well for busy chicken keepers who may not be able to refill waterers every day.
3. Hanging Waterer with Recycled Plastic Bottles

Upcycle plastic bottles to create an eco-friendly and inexpensive chicken waterer! By attaching several recycled bottles to a platform or hanging structure, you can create a simple waterer that uses gravity to feed water into a tray or bowl below.
Start by drilling small holes in the bottom of the bottles and attaching them to a frame using sturdy rope or wire. The water will slowly drip from the bottles into the tray below as the chickens drink. This system is easy to install and requires no pumps or complicated mechanisms, making it a perfect beginner project for new chicken owners.
Not only does this design recycle plastic bottles, but it also provides a spill-free, efficient way to keep your flock hydrated. Just be sure to monitor the water level to ensure that it’s refilled when necessary.
4. Automatic Float Valve Waterer
An automatic float valve waterer system is an excellent choice for anyone looking to set up a hassle-free water source for their chickens. This system uses a float valve to regulate the water level in a container, much like a toilet tank’s fill valve. Once the water level drops below a certain point, the float valve activates, allowing fresh water to refill the container.
To create an automatic float valve waterer, you’ll need a large container (such as a plastic barrel or bucket), a float valve, and some piping. Install the float valve at the correct height in the container, connect it to a water source (such as a hose), and make sure the system is level. The float valve will automatically refill the waterer as needed, ensuring your chickens always have fresh water without any intervention.
This system is perfect for large flocks or chicken keepers who may be away for extended periods. Since the float valve maintains the water level, there’s no need to manually refill the container every day.
5. Trough Waterer with Rubber Mat
For those who prefer a simple and durable design, a trough waterer made from a plastic or metal trough is an excellent option. These waterers are ideal for larger flocks, as they can hold a lot of water and provide multiple drinking stations.
To prevent spillage and keep the water clean, you can place a rubber mat under the trough. The mat will catch any excess water that spills out, keeping the area dry and preventing the water from mixing with the dirt. This setup works well for chickens that drink a lot of water and need frequent refills.
The trough waterer is easy to install and maintain. Just make sure to clean the trough regularly to prevent algae and bacteria build-up, and you’ll have a reliable waterer for your chickens.
6. Rainwater Harvesting Chicken Waterer

If you’re looking to be more sustainable and eco-friendly, consider building a rainwater harvesting chicken waterer. This system collects rainwater from your roof or another outdoor surface and channels it into a container for your chickens to drink from.
Start by setting up a rainwater collection system with gutters and downspouts that direct water into a storage container, such as a barrel. You can then install a float valve or gravity-fed system to deliver the water to your chickens. Make sure to filter the water before it reaches the chickens to ensure it is free from debris and contaminants.
This setup not only provides fresh water to your flock but also helps conserve water, making it an environmentally friendly option. It’s especially useful in areas with frequent rainfall and can reduce your overall water usage.
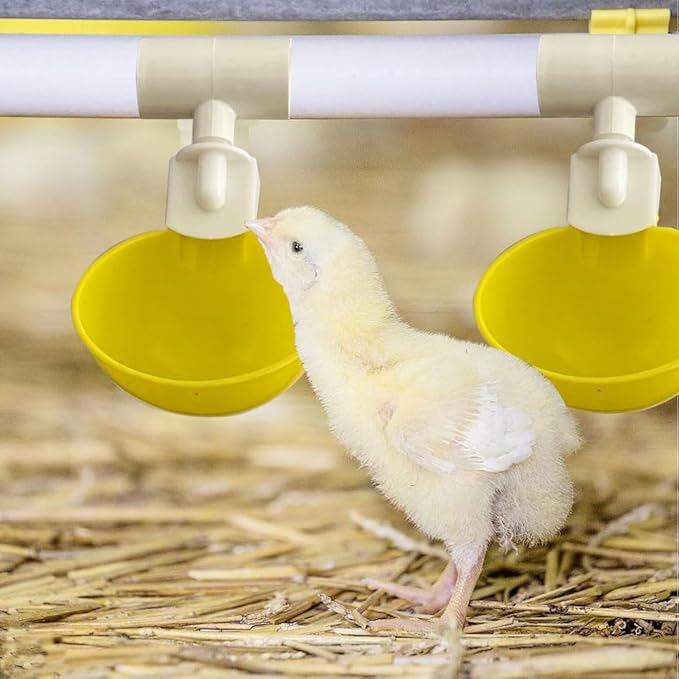
7. Automatic Waterer with Old Milk Jug
Repurpose an old milk jug to create an automatic waterer for your chickens. This is one of the most affordable DIY solutions for small flocks. You can use the milk jug as a reservoir that automatically refills a bowl or tray as the chickens drink.
To make this waterer, cut a small hole in the bottom of the milk jug and place it upside down over a shallow tray or bowl. The water will flow out slowly as the chickens drink, and once the water level drops, more will automatically refill the bowl.
This design is simple, effective, and can be built in just a few minutes with minimal materials. Plus, it’s a great way to reuse plastic jugs that might otherwise be thrown away.
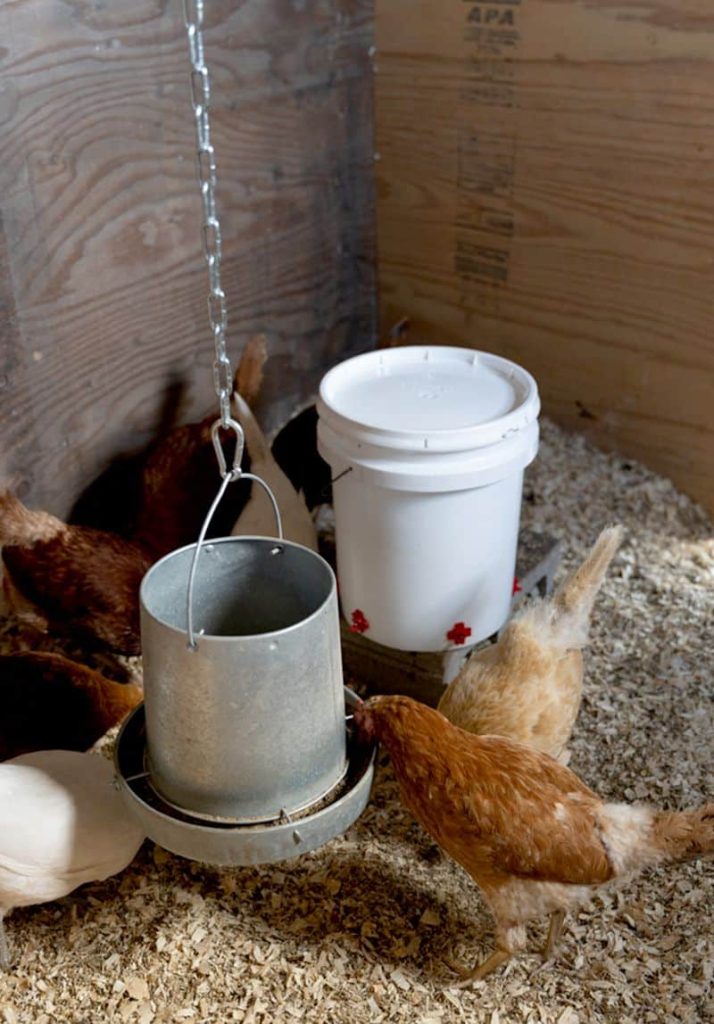
8. Galvanized Metal Bucket Waterer
Galvanized metal buckets are a popular choice for DIY chicken waterers due to their durability and long lifespan. These waterers can hold a large amount of water, making them ideal for larger flocks or chicken keepers who don’t want to refill their waterers frequently.
To create this waterer, simply hang or place a galvanized metal bucket in a convenient location within the coop or run. Attach a nipple waterer or small cups to the bottom of the bucket, and the water will be dispensed as the chickens peck them. The galvanized metal prevents rusting, ensuring that your waterer lasts for years.
This DIY waterer is easy to maintain, and the bucket’s sturdy construction makes it resistant to damage, even from curious chickens.
9. Elevated Waterer with PVC Stand
An elevated waterer can be a great solution for keeping your chicken’s water clean and preventing them from kicking bedding or dirt into the water. This setup elevates the water container off the ground, which not only keeps the water clean but also makes it more accessible for your chickens.
To create an elevated waterer, use PVC pipes or wood to construct a stand that will hold a bucket or container of water. The height of the stand should allow the chickens to drink easily without bending down too much. Attach a simple watering system, such as nipple waterers or cups, to the bottom of the container. The elevated design helps prevent spills and encourages the chickens to drink more often.
This DIY waterer is easy to build, and the elevated design is particularly useful in preventing messy conditions in your chicken coop.
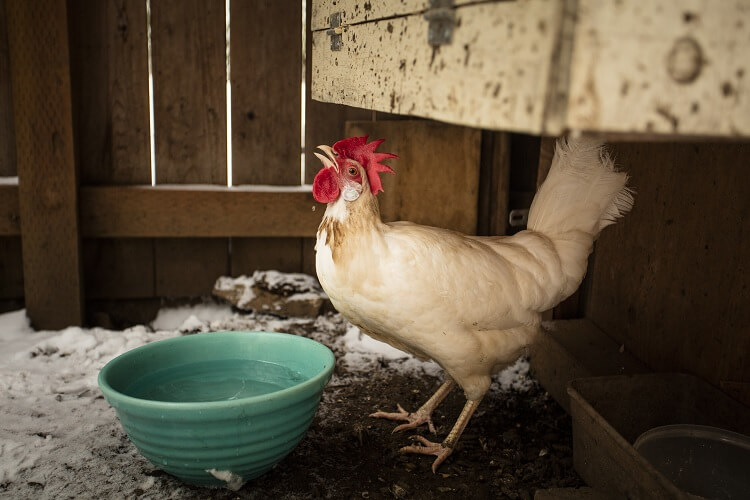
10. Bowl Waterer with DIY Lid
If you’re looking for a simple and budget-friendly chicken waterer, a bowl waterer with a DIY lid might be the solution. This design uses a basic bowl or shallow tray to hold water, with a lid to prevent debris or pests from contaminating the water.
To make this waterer, simply use a sturdy, shallow bowl or dish and create a lid that fits snugly over the top. You can use a piece of wood, plastic, or even a repurposed container lid. Cut a hole in the center of the lid just big enough for the chickens to drink through. This design works especially well for smaller flocks or in situations where you need a temporary waterer.
The lid helps keep the water clean, and the shallow bowl design ensures the chickens don’t accidentally spill the water. Plus, it’s incredibly easy to build and requires minimal materials.
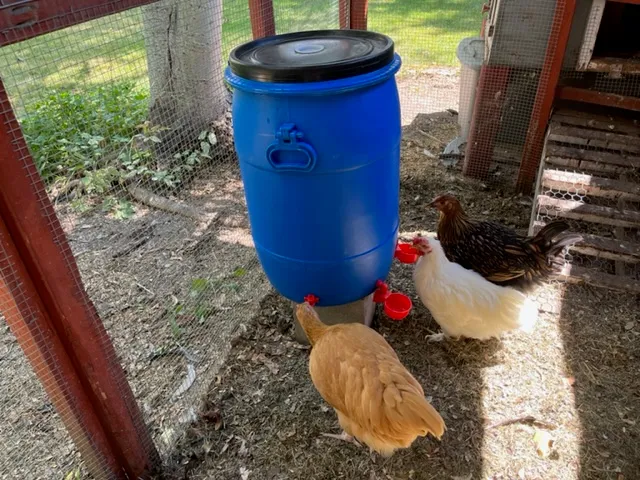
11. Plastic Barrel Waterer with Valve System
For larger flocks, a plastic barrel waterer with a valve system is a fantastic option. The large capacity of the barrel means you won’t have to refill it as often, and the valve system ensures that your chickens always have access to fresh water.
To create this waterer, simply install a valve system at the bottom of the barrel that releases water into cups or nipple waterers. This gravity-fed design makes it easy for the chickens to access the water and ensures that it stays clean. You can place the barrel on a stand or hang it to make it more accessible for your flock.
This DIY waterer is durable, easy to maintain, and works well for large flocks. Plus, it’s an efficient way to keep your chickens hydrated without constant refilling.
12. Floating Dish Waterer
A floating dish waterer is a clever and simple DIY design that uses a floating mechanism to maintain a consistent water level in a dish or tray. This is a great option if you’re looking for an easy, low-maintenance waterer that ensures your chickens always have access to fresh water.
To create this waterer, place a floating object, like a piece of foam or a plastic lid, in the water dish. As the chickens drink, the water level will drop, and the float will rise to keep the water level consistent. You can also use a plastic bottle or small buoy to create the floating effect. This method is especially useful for keeping water clean and preventing the water from evaporating too quickly.
The floating dish waterer is simple to make and works well for smaller flocks or in areas where you need to keep water levels regulated without constant refills.
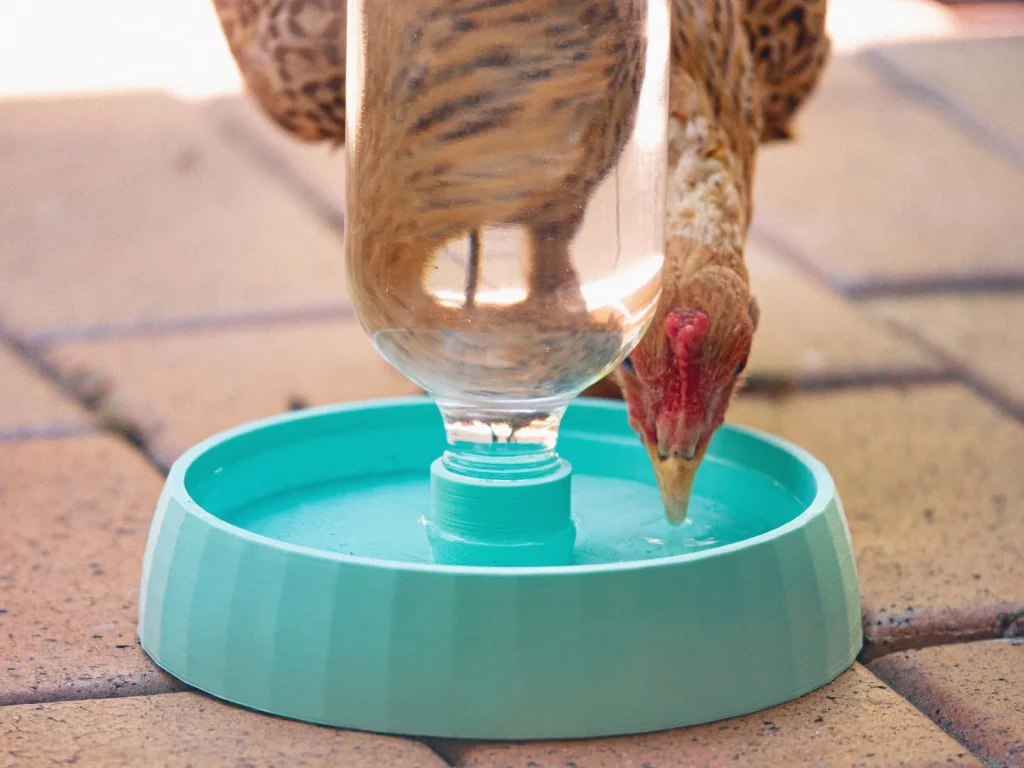
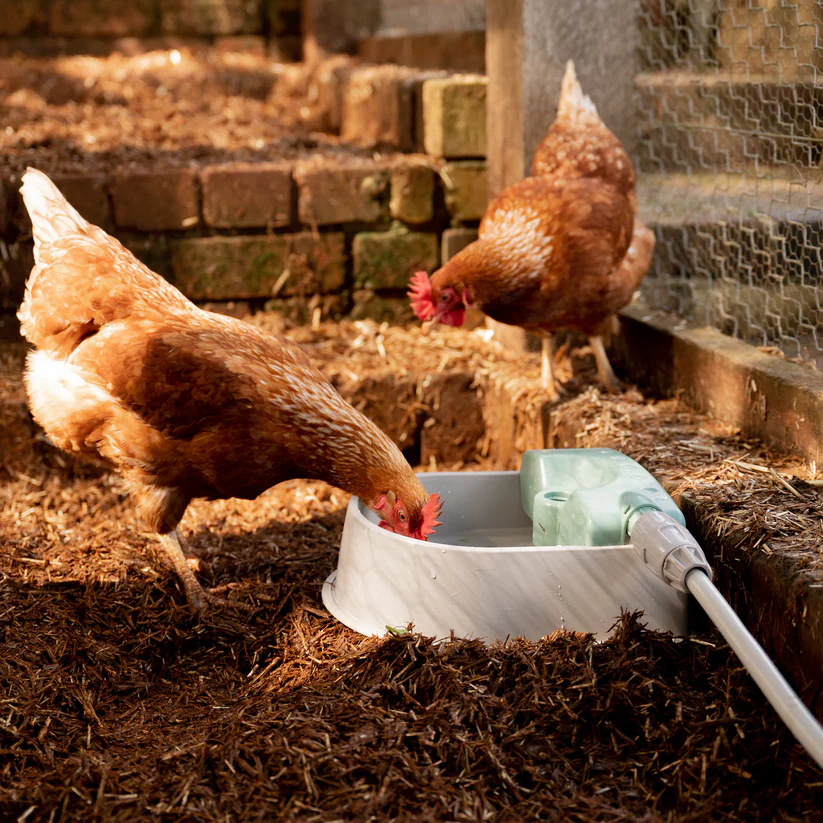
13. Drip Waterer with Bottle and Tray
This drip waterer system uses a bottle suspended above a shallow tray, allowing water to drip slowly into the tray as the chickens drink. It’s a simple and cost-effective design that provides a consistent water source for your flock.
To make a drip waterer, you’ll need a plastic bottle with a small hole in the bottom and a shallow tray to collect the water. Fill the bottle with water and hang it upside down over the tray. The water will drip out slowly, ensuring that your chickens have a steady supply of water throughout the day. You can adjust the size of the hole in the bottle to control the rate at which the water drips.
This system works well for small to medium-sized flocks and requires minimal maintenance. Plus, it’s easy to build with recycled materials, making it an eco-friendly option.
14. Hanging Waterer with Rain Gutter

For a more innovative and sustainable approach, consider using a rain gutter to create a hanging waterer. This system collects water and channels it into a trough or container for your chickens to drink. It’s a great option for those who want to make use of rainwater while keeping their chicken waterer elevated and clean.
To build this waterer, you’ll need a rain gutter, a downspout, and a trough or container to catch the water. Install the gutter along the roof of your chicken coop or run, and position the downspout so that the water flows directly into the container. You can attach a float valve or gravity-fed system to keep the water level steady.
This design is both eco-friendly and functional, as it helps conserve water by using rainwater and keeps the water clean by preventing debris from falling into the trough.
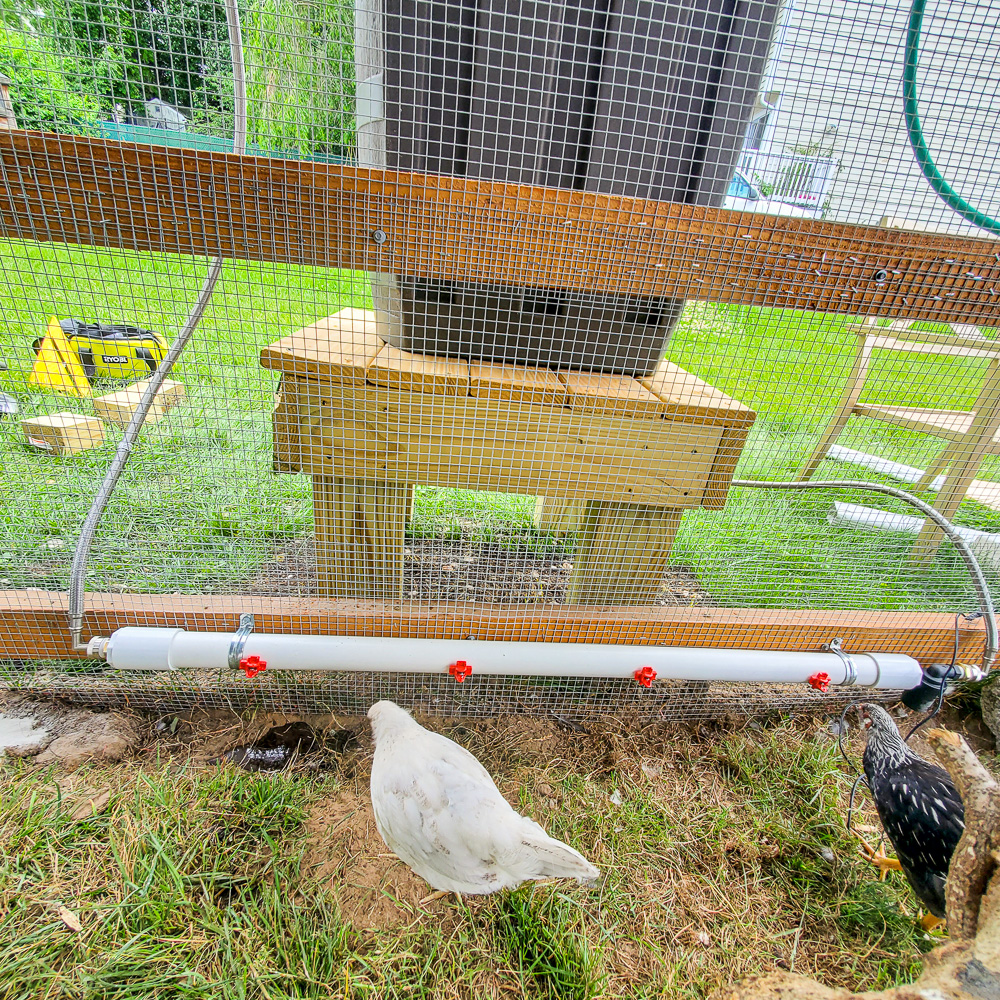
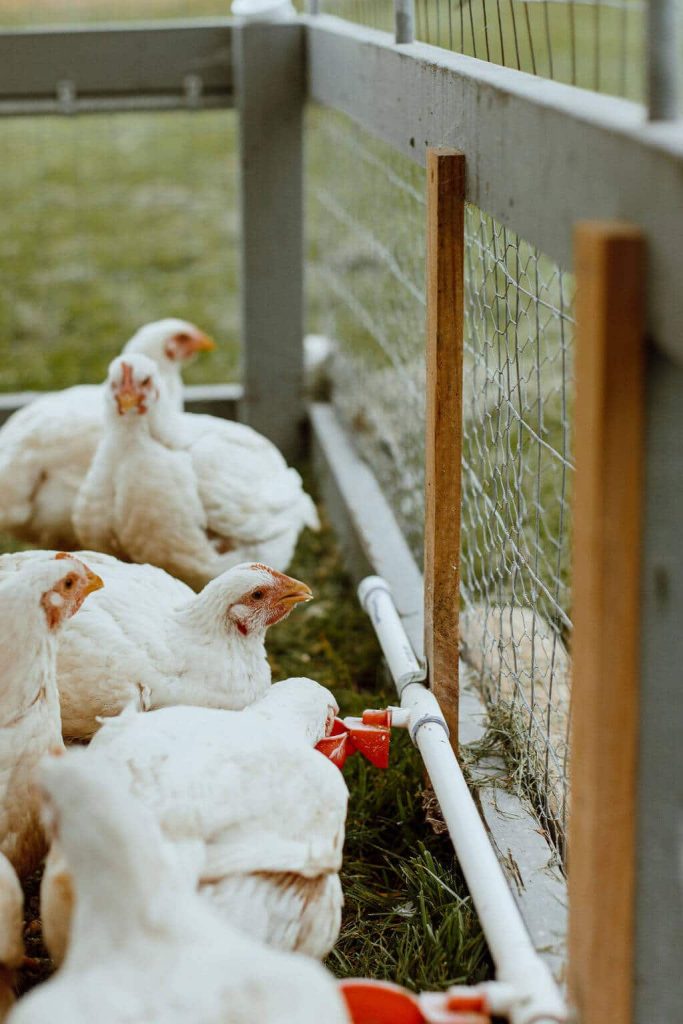
15. Plastic Tube Waterer
A plastic tube waterer is a unique and straightforward design that allows water to flow directly from a container into a plastic tube, where it can be dispensed to the chickens. This system is particularly useful for small to medium-sized flocks and can be made using inexpensive materials.
To make this waterer, you’ll need a large plastic container, a plastic tube, and a valve or nipple at the end of the tube. Cut a hole in the container for the tube and attach the tube securely. As the chickens drink, the water will flow through the tube, providing fresh water whenever they need it. The tube can be positioned at different heights to ensure it’s accessible for the chickens.
This waterer is easy to clean and maintain and provides a direct, spill-free way for your chickens to drink.
16. Hose-Connected Waterer
If you’re looking for a simple yet efficient way to keep your chickens hydrated, a hose-connected waterer could be just what you need. This system connects directly to your garden hose and can deliver a constant flow of water to your chickens.
To create this waterer, connect a hose to a container or bowl where the chickens will drink. You can use a basic drip nozzle or install a float valve system to ensure that the water level remains steady. By attaching a hose, you can easily refill the waterer without having to carry heavy containers or jugs of water.
The hose-connected waterer is an excellent option for larger flocks or chicken owners who want to streamline their watering system and reduce the time spent refilling waterers.
17. Bucket Waterer with DIY Lid and Nipple
A bucket waterer with a DIY lid and nipple is another great option for those looking for a simple, affordable, and effective water system for their chickens. This design uses a basic bucket with a lid and a nipple waterer to deliver water to the chickens while preventing contamination and spillage.
To create this waterer, drill small holes in the bucket and attach nipple waterers to the bottom. Place the lid on the bucket to prevent debris from falling into the water. The nipple system ensures that only the chickens can access the water, reducing waste and maintaining cleanliness.
This DIY waterer is easy to make, requires minimal materials, and works well for both small and large flocks.
18. Recycled Pallet Waterer
If you have access to recycled pallets, you can create an innovative chicken waterer that’s both functional and eco-friendly. By using the slats from a pallet and a container or bowl, you can design a waterer that is elevated and easy to maintain.
Start by disassembling the pallet and using the wooden slats to create a frame. Attach the frame to a container or shallow tray that will hold the water. You can also incorporate a rainwater collection system or hose to provide a steady supply of fresh water.
This waterer is a great way to recycle materials you may already have on hand, and it provides a sturdy and elevated water source for your chickens.
19. DIY Trough Waterer with Spigot
A DIY trough waterer with a spigot is an excellent option for those looking for a durable and adjustable water system. The spigot allows you to control the water flow and ensures that you can easily refill or adjust the water level when needed.
To make this waterer, use a large plastic or metal trough and install a spigot at the bottom. Attach a hose to the spigot, and you can control the flow of water into the trough. You can also use a float valve to regulate the water level and prevent overflow.
This design works well for large flocks and is easy to maintain. The spigot allows for quick refills and makes it simple to adjust the water level as needed.
20. Homemade Waterer with Barrel and Pipe
Using a large barrel and some PVC pipe, you can create a homemade chicken waterer that provides fresh water to your flock while being easy to maintain. This design uses gravity to distribute water through the PVC pipes, allowing your chickens to drink without creating a mess.
To build this waterer, attach a PVC pipe to the bottom of the barrel and drill small holes for the water to flow out. You can install nipple waterers at the end of the pipes to allow your chickens to drink directly from the pipe. This system is highly efficient and can be customized to fit the size of your flock.
It’s a simple yet effective design that provides a clean, reliable water source for your chickens.
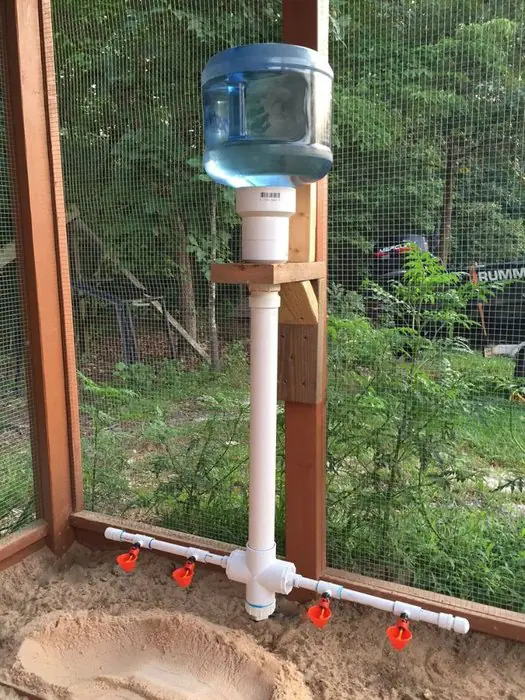
21. Free-Standing Waterer with Multiple Drip Stations
For those who have a large flock and need a more advanced watering system, a free-standing waterer with multiple drip stations can be a great option. This design uses a large container and multiple drip points to allow several chickens to drink at once without waiting in line.
To create this waterer, attach several PVC pipes or tubes to a container, and place a drip station or nipple waterer at the end of each pipe. The water will flow into the pipes and drip slowly into the cups or trays below. This system ensures that all your chickens have easy access to water at the same time.
This design is perfect for large flocks, as it can accommodate multiple chickens drinking at once and is easy to maintain with minimal effort.
Conclusion
Building a DIY chicken waterer is a great way to save money, reduce waste, and ensure your chickens always have access to fresh water. From simple bucket designs to more complex automated systems, there are countless ways to provide hydration for your flock. Whether you have a small backyard flock or a larger operation, these 21 DIY chicken waterer ideas offer a variety of solutions to meet your needs.
By investing a little time and creativity, you can create a custom waterer that keeps your chickens hydrated and happy, while also saving you time and effort in the long run. Choose a design that fits your space, budget, and flock size, and enjoy the satisfaction of knowing your chickens are well cared for.